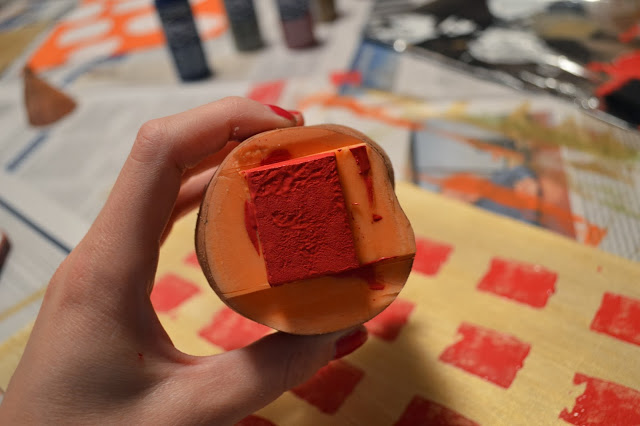
While Richie was in Arizona this weekend, I turned on Revenge, grabbed a glass of wine, and got to work.
I purchased
a few colors of acrylic paint, foam paintbrushes, and some canvas paper at
Michaels; then ran to the grocery store for an acorn squash and a sweet potato.
My recommendation for any DIY project is do
not set your heart on what you want it to look like in the end. Trust me, art
projects very rarely come out exactly the way you have envisioned them, at
least for me they don’t. Try to just have fun and not criticize your work
before it’s complete.
First I laid out lots of newspaper. Unfortunately
for Richie, all we had laying around was his new Barron’s magazine that came in
the mail that day. Sorry Honey! Don’t
worry I laid it out to dry and put it back together for you when I was all done. It’s just more festive now. Then I laid out all of my supplies on the
table. We didn’t have and paper plates so I used tinfoil for my paint. I began by painting each piece of canvas paper, using my large sponge brush, with one coat of paint.
While I was letting that dry, I cut my squash and sweet potato into the designs I wanted. After my first coat had dried, about 15 minutes, I painted my veggies with my small sponge brush and pressed them down onto the canvas paper like stamps, waiting about 15 minutes between each coat.

When all four were the way I wanted them to look complete, I positioned them into my frames and hung them on the wall.
Overall,
this project took about 1-2 hours start to finish and cost about $15 (plus the
cost of the frames). I am so happy with
the ways these turned out! They have not
only brightened up our entry but have become a symbol that we are home each
time we walk through the door.
Xoxo,
Whitney


No comments:
Post a Comment